

In the last one to two years, the IT industry has been undergoing a fundamental shift away from “cloud-first” approaches toward self-hosted solutions, driven by regulatory requirements (e.g., GDPR), geopolitics, and IT security. One of the main benefits that companies such as Vercel, Heroku, or Netlify offer with their products is a degree of simplicity that isn’t available for users running applications on self-hosted infrastructure. Coolify aims to bridge this gap by providing a one-click deployment solution for websites, databases, and more complex applications. In this article, I will take a look at Coolify, showing how to install it, run applications, and how it compares to its cloud-based cousins. Table 1 provides basic information about the Coolify project.
| Name: | Coolify |
|---|---|
| URL: | https://coolify.io/ |
| License: | Apache 2 |
| Documentation: | https://coolify.io/docs/ |
| First Release: | March 24, 2021 (1.0.0) |
| Latest Release: | April 27, 2026 (4.0.0) |
| Paid Version: | Coolify Cloud (managed control-plane) |
Table 1: Coolify project information.
How to Install Coolify
The easiest way to install Coolify is to use the shell script provided in the official documentation. This script only supports Ubuntu LTS versions and won’t work on other distributions, such as Debian or CentOS. A manual installation guide, which is also mostly straightforward to follow, is provided for other distributions.
As a security precaution, I recommend downloading the installation script from GitHub, verifying its contents, and only then running it on your server. Unfortunately, the Coolify project doesn’t provide checksums for that script, so you should at least skim the script for obvious red flags.
After installation, Coolify’s web interface is available at http://IP_ADDRESS:8000. There is no built-in way to access the interface over an encrypted HTTPS connection. Since you need to set the initial admin user's password when you access the web interface for the first time, I recommend accessing it over an SSH tunnel by running the following command:
ssh -L 8000:localhost:8000 IP_ADDRESS
Then use the URL http://localhost:8000 to access Coolify. After setting up the initial user, navigate to Settings in the left sidebar and enter the HTTPS URL that you will use to access the Coolify web interface moving forward. Don’t forget to click Save before navigating to another page, as you will not be warned about unsaved changes. After a couple of seconds, you will be able to access Coolify at https://YOUR_DOMAIN, and you can quit the SSH session opened above.
Deploying Your First Application
After creating your first project in the web interface, it’s time to deploy the first application. Coolify’s basic principle is that any deployed application runs as a Docker container, meaning you can deploy any application that runs in Docker. Coolify can build container images itself (e.g., from your own GitHub or GitLab repository) when you provide it with a Dockerfile or a Docker Compose file. Alternatively, it deploys existing images without building them first (e.g., for third-party applications). For this article, I will deploy a pre-built application from the service catalog (see this repository for examples of how to build and deploy your own application).
The Coolify team maintains a large list of ready-to-deploy applications in the service catalog. Click on Projects in the left sidebar, select your project, and then click on Add Resource. The New Resource page presents you with the full service catalog. A very popular self-hosted application is Nextcloud, which provides file hosting and collaboration features. Scroll down the list of services and click on Nextcloud With Postgres. Without changing any of the pre-filled form fields, click on Deploy at the top right, and you will see the deployment logs in the pop-up. Click on the X to close the pop-up when the deployment is done.
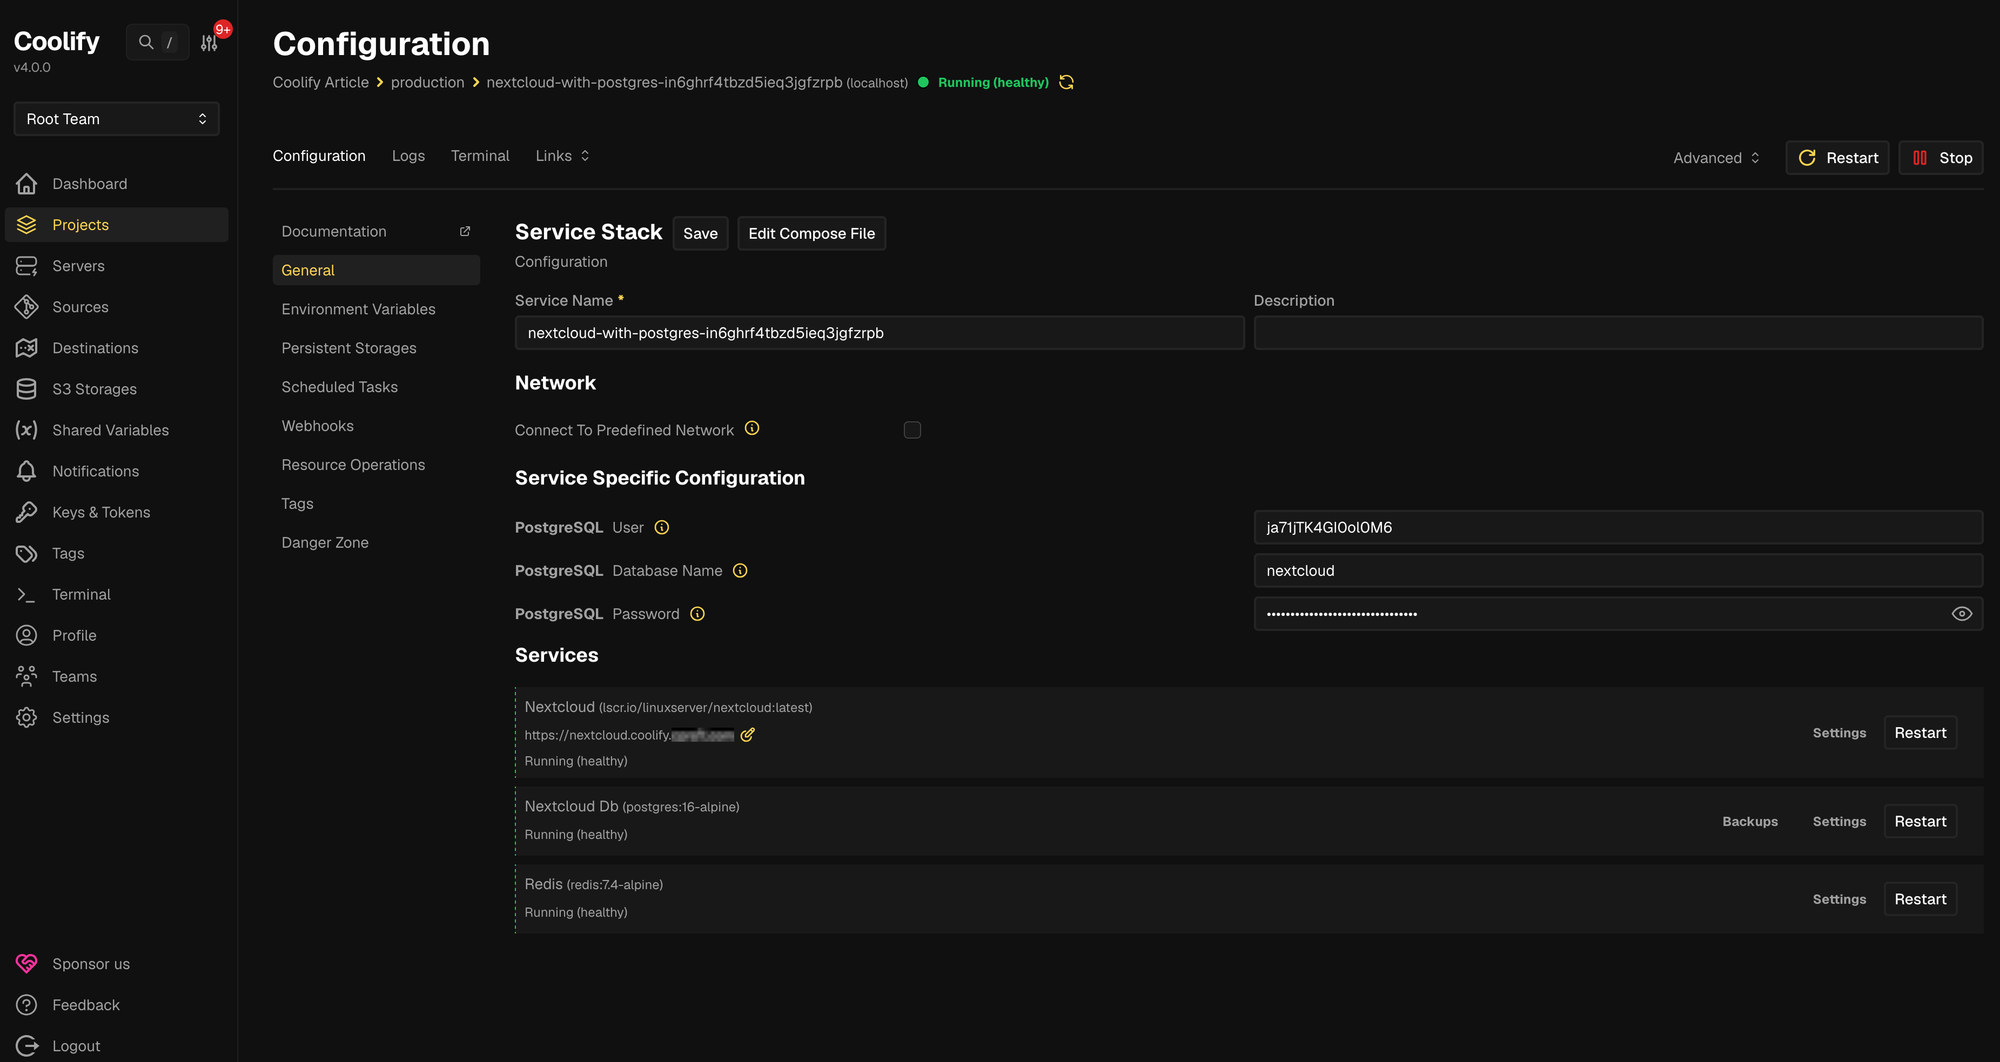
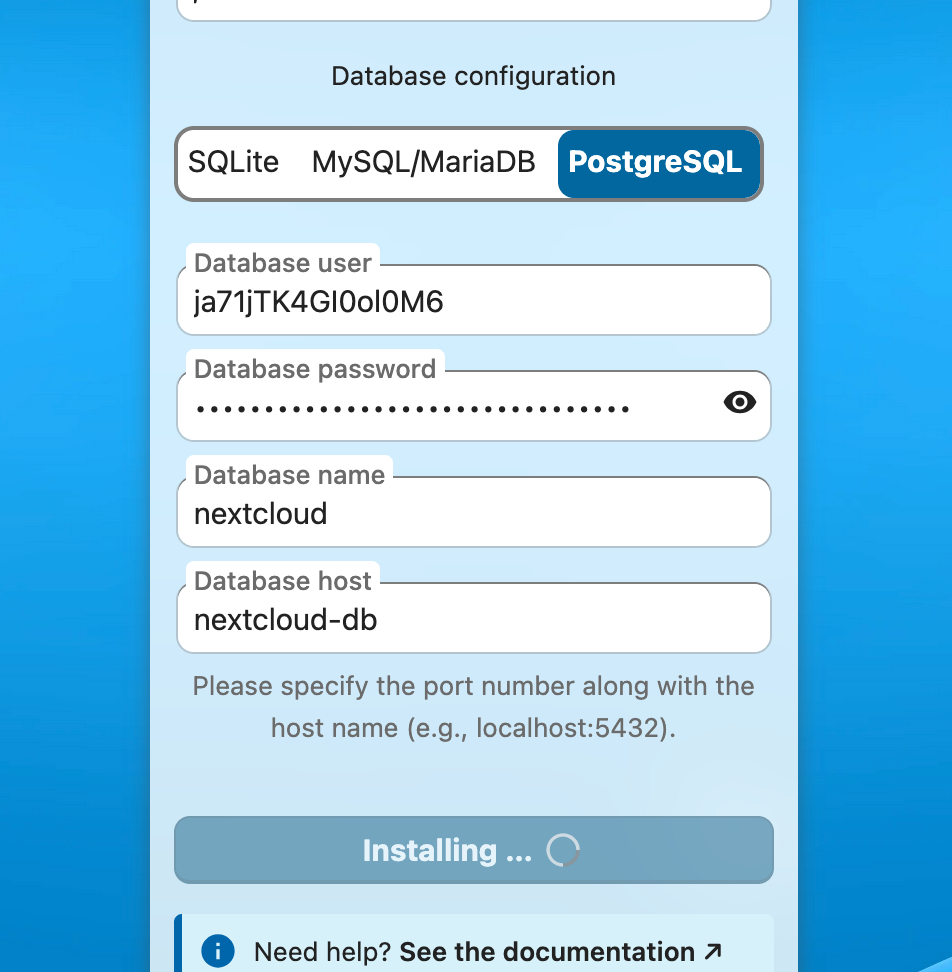
The first thing you should do next is change the URL from HTTP to HTTPS. In the list of services, click on Settings for the Nextcloud service. Change the URL to https://nextcloud.YOUR_DOMAIN and ensure that a DNS A record exists for the given domain name pointing to your Coolify server. Coolify will do the heavy work of retrieving TLS certificates from Let’s Encrypt. After a couple of seconds, Nextcloud will be reachable over HTTPS on the given domain. Access Nextcloud using the new URL, choose Postgres, and enter the initial configuration values (Figure 1). Unfortunately, the necessary values for the database connection aren’t pre-filled, so you’ll have to retrieve them from the Coolify configuration (Figure 2). In Coolify, navigate to your Nextcloud service configuration, and click on Environment Variables. You will find the database settings in the variables SERVICE_USER_POSTGRES, SERVICE_PASSWORD_POSTGRES, POSTGRES_DB, and POSTGRES_HOST.
Congratulations, you just deployed your first nontrivial application using Coolify.
Scaling Out
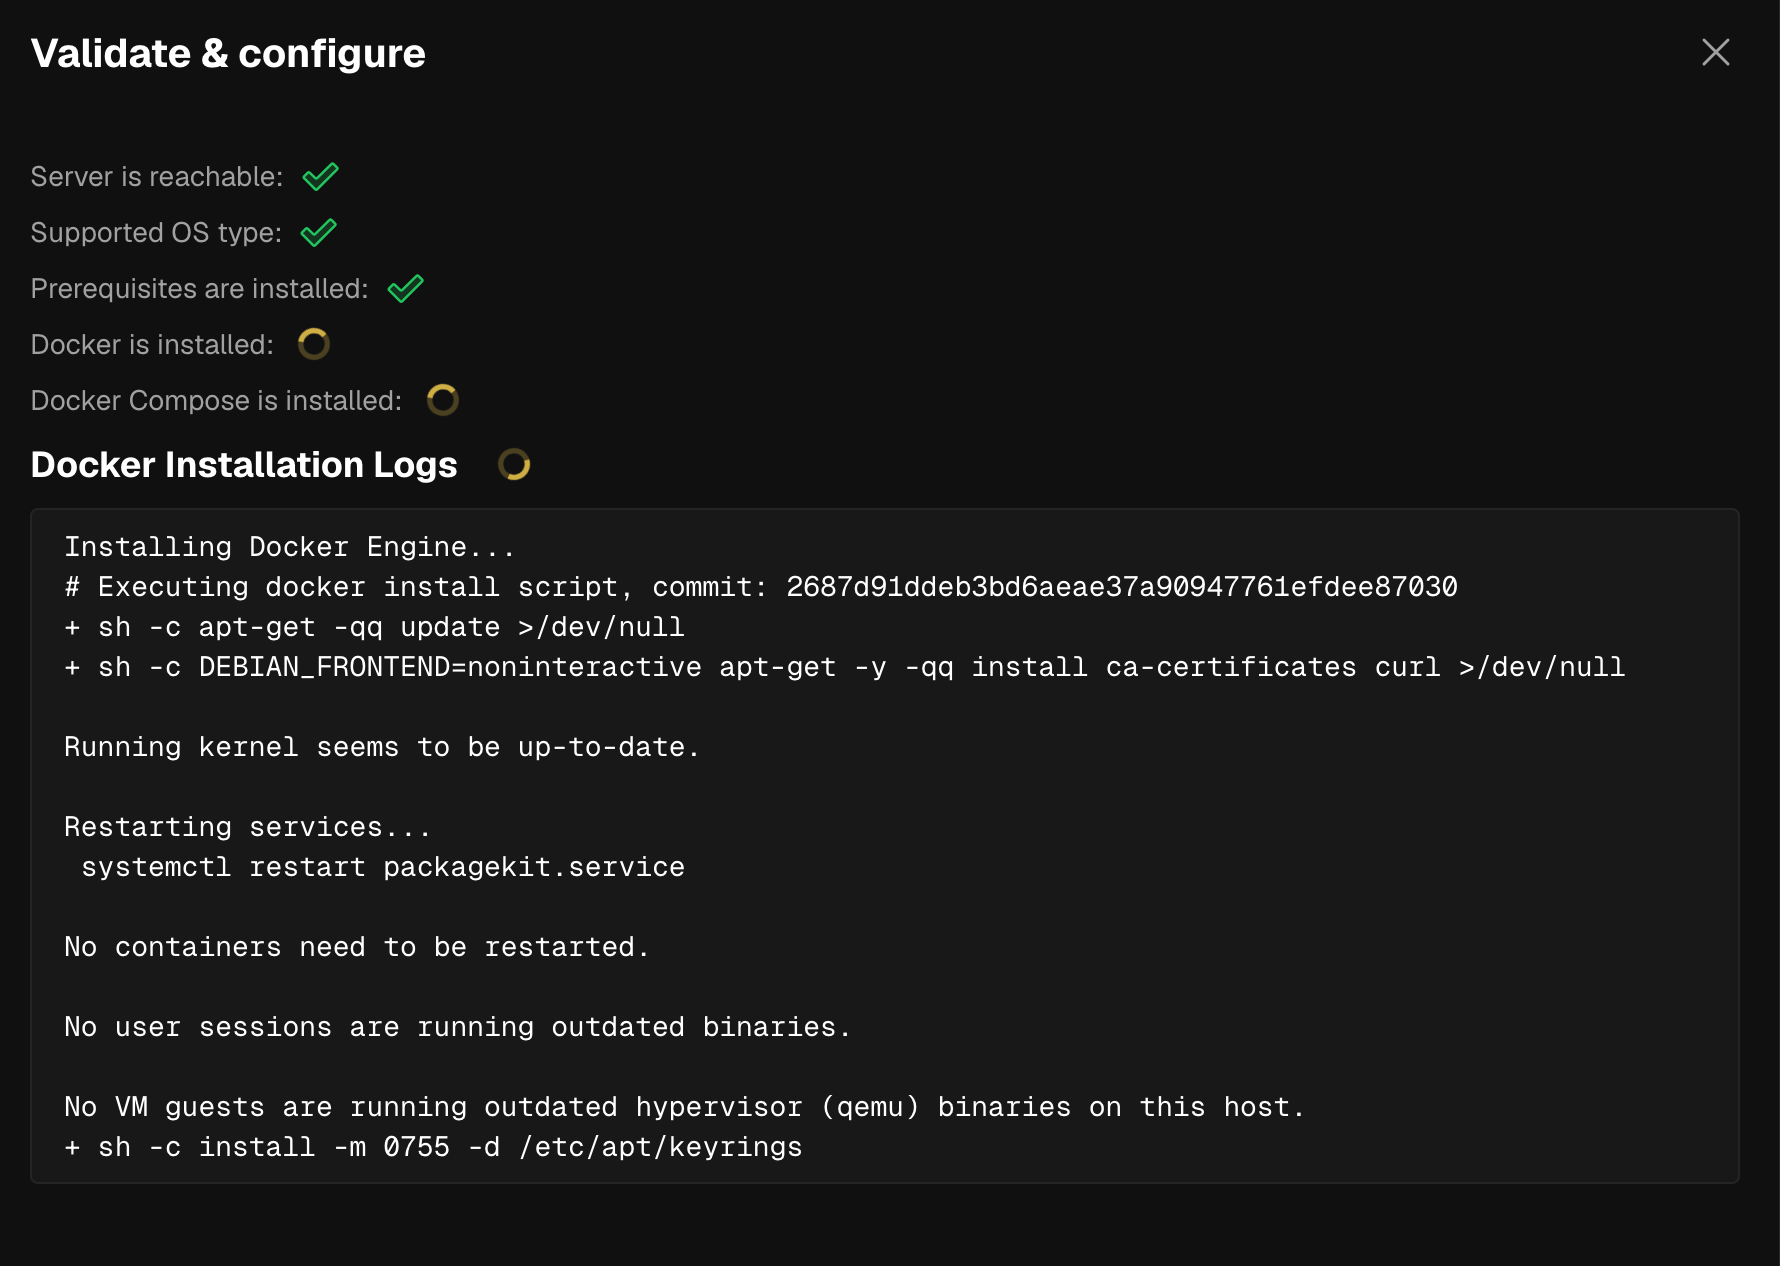
When the single server you just installed Coolify can’t sufficiently run all of your applications, Coolify lets you add more servers (Figure 3), allowing you to easily scale out your deployments or separate test and production environments onto different machines.
In the left Coolify sidebar, click on Servers, then +Add. In the pop-up, enter the IP address or domain name of your second server and choose a private key. Coolify logs into that server using SSH and the private key you select, so you will have to add the public portion of that key to the /root/.ssh/authorized_keys file on the second server. If you choose localhost’s key, you will get the public key by finding the private key on the first server and extracting the public key from it:
root@coolify-server1:~# ls -lh /data/coolify/ssh/keys
total 4.0K
-rw------- 1 9999 9999 399 May  4 03:32 ssh_key@vs2bmmvsk4us2voxyw2wdzm2
-rw-r--r-- 1 9999 9999   0 May  3 17:31 ssh_key@vs2bmmvsk4us2voxyw2wdzm2.lock
root@ubuntu-8gb-fsn1-1:~#
Using the private key’s file name, you extract its public part as follows:
root@coolify-server1:~# ssh-keygen -yf /data/coolify/ssh/keys/ssh_key@vs2bmmvsk4us2voxyw2wdzm2
ssh-ed25519 AAAAC3NzaC1lZDI1NTE5AAAAIHZXwtgEdpUYsSkf7K9p7+CdMGU7wyFjuMoUohqLKaZW coolify
root@ubuntu-8gb-fsn1-1:~#
Paste that line into the /root/.ssh/authorized_keys file on the second server and make sure that you can log in as root:
root@coolify-server1:~# ssh -i /data/coolify/ssh/keys/ssh_key@vs2bmmvsk4us2voxyw2wdzm2 root@coolify-server2.YOUR_DOMAIN
After you’ve added the key, go back to your browser and click on Continue. On the next page, there’s a large Validate Server & Install Docker Engine button. If everything worked, the pop-up (Figure 3) will close automatically, and Coolify will report success.
From now on, whenever you deploy an application, you can choose how to deploy it on one of your two servers. It is important to understand that Coolify doesn’t handle load balancing for you. When you deploy an application to your second server, ensure the DNS entry for the application also points to the second server.
Sending Emails
Before inviting additional users via email or receiving notifications from Coolify, you need to specify how to send emails via Settings | Transactional Email. Unfortunately, Coolify doesn’t provide a simple way to test and debug email server settings; there is a Send Test Email button at the top of the page, but it doesn’t provide any feedback on the success or failure of a sent message. The logs also don’t provide any information on this, so you’re left with testing the email connection yourself.
To check general connectivity to the SMTP server, SSH into your Coolify instance and run Netcat inside the Coolify container (replace the port number 465 with the port of your SMTP server):
$ sudo docker exec coolify nc -w1 -v YOUR_SERVER 465
Connection to YOUR_SERVER port YOUR_PORT [tcp/urd] succeeded!
To verify that TLS works, use openssl:
$ sudo docker exec coolify openssl s_client -connect YOUR_SERVER:465
For STARTTLS use:
sudo docker exec coolify openssl s_client -starttls smtp -connect YOUR_SERVER:587
Some hosting providers, like Hetzner, block SMTP ports 25 and 465, but they allow 587 with STARTTLS. Consequently, you will need to run through these manual steps before sending a test email from Coolify.
Teamwork
To use Coolify as a team or even as a group of teams, you can invite more users and assign each user to a team in Coolify. Confusingly, the Teams menu item is actually the one used to create a new team or manage the current one, so the name "Team" would probably have been a better fit for that menu item. Switching between teams is done using the drop-down menu located at the top-left.
Each team maintains its own set of servers, so the servers added before for the Root Team are not visible to any other team, and there is no way for teams to share the same underlying virtual or dedicated machine. This avoids the noisy neighbor problem where one team consumes all the resources so no other team can deploy workloads, but it requires more thought to be put into your architecture and team setup up front.
While Coolify supports team collaboration, its permission model should be treated as coarse-grained rather than enterprise-grade Role-Based Access Control (RBAC). You can merely assign a user either the Admin or Member role; even members have fairly wide-ranging permissions. There is no way in Coolify to assign per-service or action-level permissions (e.g., "this user can deploy but not delete" or "this user can only manage one service").
Avoid treating Coolify team membership as a least-privilege boundary unless you have tested the exact actions available to each role. For small trusted teams, the model may be sufficient. For larger organizations, contractors, shared hosting, or regulated environments, Coolify’s current permission model is likely one of the areas to evaluate carefully before adoption. There is a GitHub issue requesting more fine-grained permissions, but it is only targeted for Coolify 5.x, so how version 5 will improve the situation remains unclear.
Security
At the beginning of the year, several vulnerabilities were published that allowed attackers to fully take over the servers under specific circumstances. The Coolify team has closed all these bugs rather quickly, which is a good sign of the project’s stance on security. Users should apply the usual best practices, such as closely following the project’s releases for updates, putting the Coolify dashboard behind a VPN (e.g., using the SSH port-forwarding method mentioned above), following the least-privilege principle for any Coolify users (if you’re not the only one deploying applications on your server), and only deploying applications from trusted sources. To quickly recover from compromises, you should always have an off-site backup of your Coolify instance available and ensure your restore processes work as expected (e.g., by occasionally restoring Coolify from the backup).
As to operational security, not using Coolify’s Applications feature, where Coolify builds the container images, should be considered to prevent build-time attacks and resource starvation by the build processes. The better way is to use a dedicated CI pipeline and infrastructure, where container images are built and then merely consumed by Coolify.
Review & Outlook
With its centralized workload management and general ease of use, Coolify provides many of the features necessary to run applications on self-managed servers, such as a Virtual Private Server (VPS) or on dedicated hardware. The project has a large community of supporters and users active on Discord and GitHub that can usually help with any issues or questions.
In some areas, Coolify still has a few rough edges, and users may need to pay extra attention to production-grade workflows such as backups or upgrades of Coolify itself. There is also no RBAC-style permission model, which makes using the same Coolify instance with a team of users hard or even impossible to implement.
This article was made possible by support from Hetzner through Linux New Media’s Topic Subsidy Program.