

In the last few years, automation has moved from a niche topic for hobbyists and industrial control engineers into a general requirement for many IT teams. Companies want to connect APIs, databases, message queues, sensors, dashboards, alerting systems, and legacy services without writing a full application for every small workflow. At the same time, the number of systems that expose HTTP APIs, MQTT topics, webhooks, or event streams has grown significantly. While the individual systems are programmable, gluing them together manually still takes a lot of time.
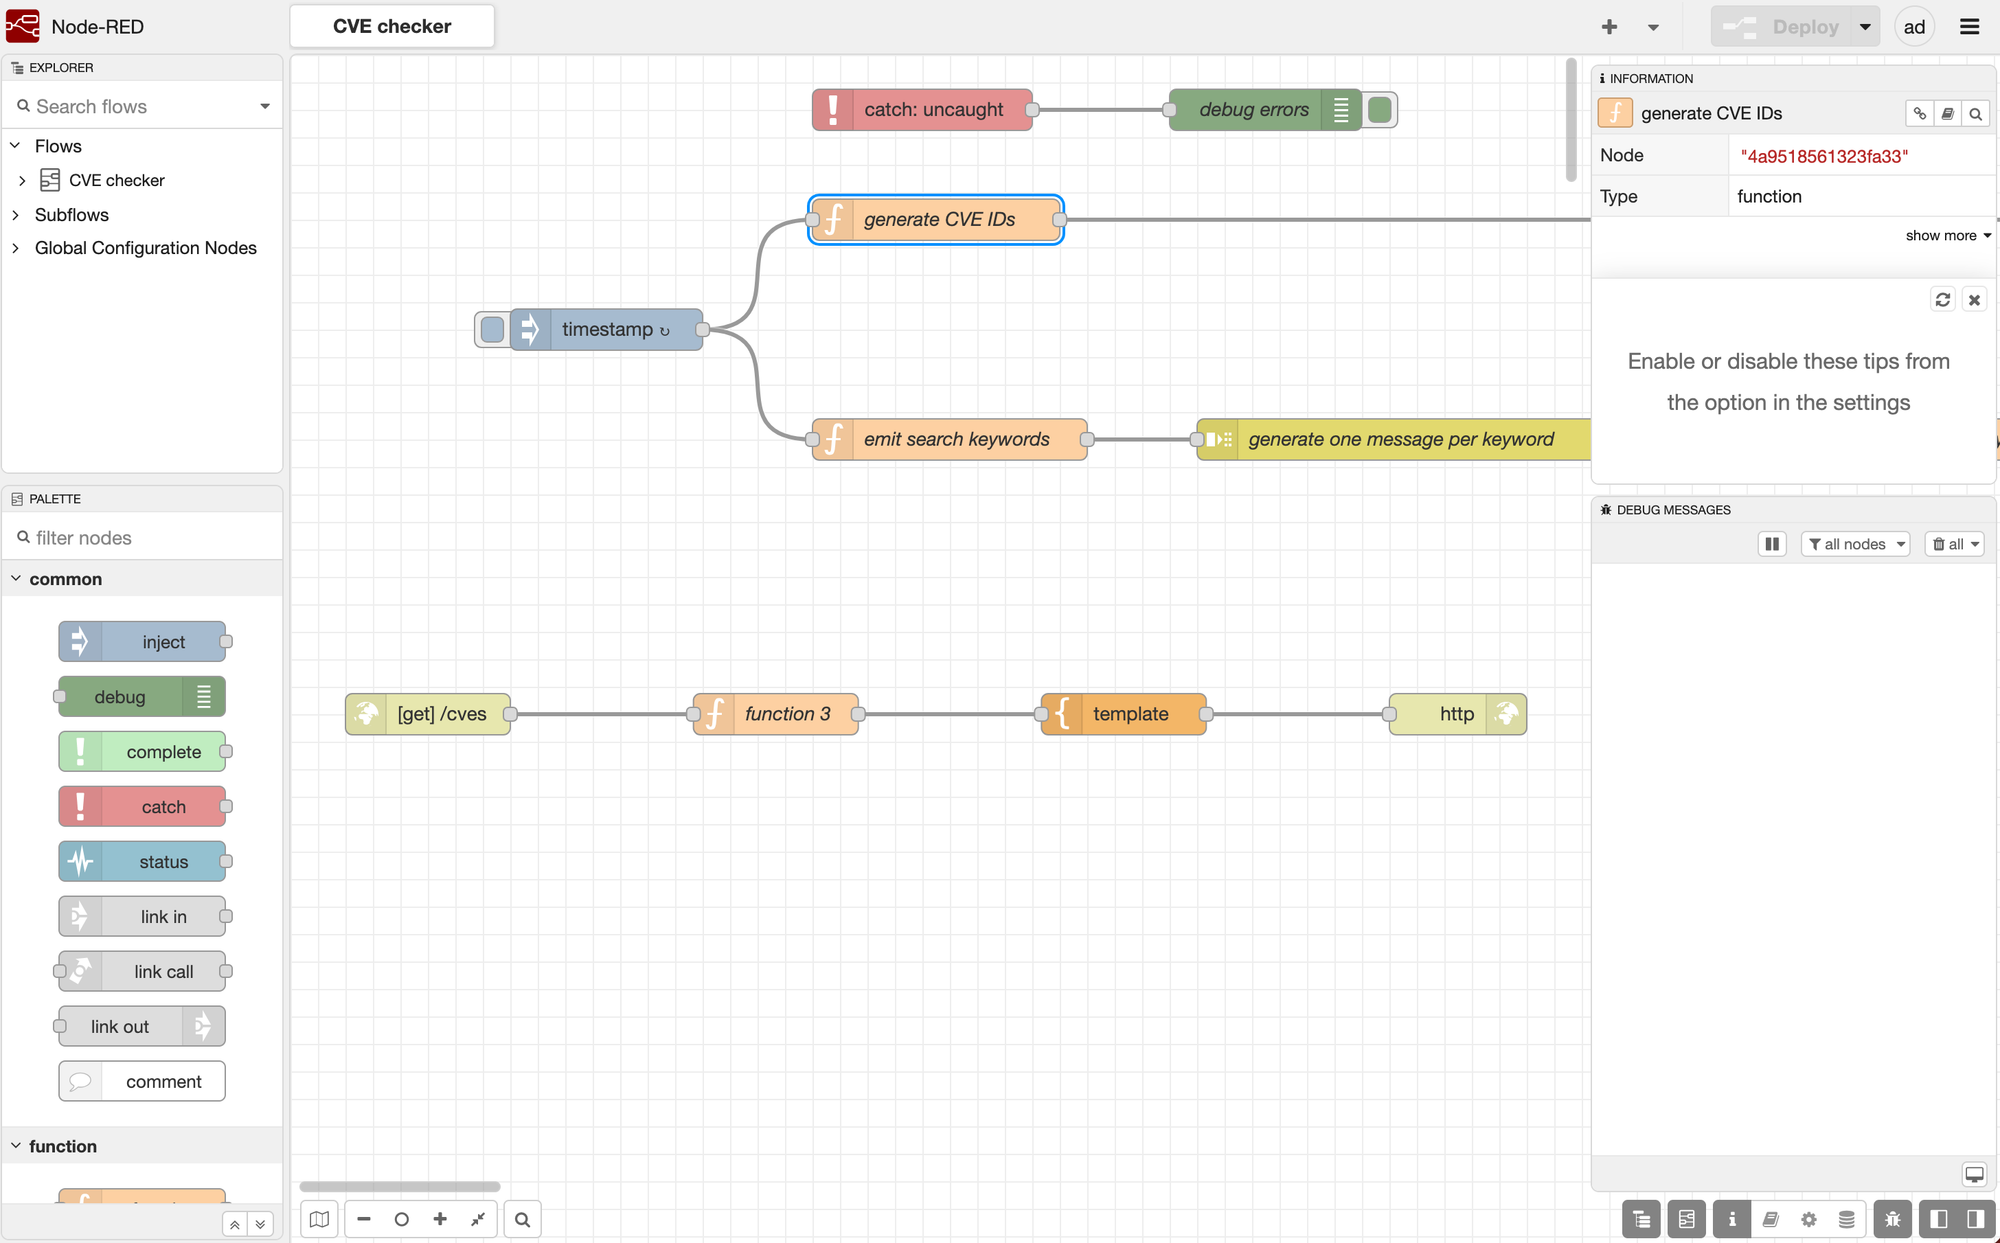
Node-RED is one of the most popular tools for solving that problem. It is a low-code, flow-based programming environment built on Node.js. Instead of starting with an empty source file, users start with a blank canvas, drag nodes onto it, connect them with wires, and deploy the resulting flow to a runtime (Figure 1). Each node performs one task: receive an HTTP request (Figure 2), subscribe to an MQTT topic, transform a JSON object, write to a database, call an API, send an email, or display a dashboard element. The flow becomes both the implementation and the documentation of the automation.
Node-RED started in the IoT world, and that heritage is still visible. It is very strong when working with MQTT, serial devices, industrial protocols, sensors and edge systems. But it is no longer limited to IoT. It is also useful for API glue code, home automation, prototyping, operational tooling, monitoring integrations, and internal workflows.
In this article we will take a practical look at Node-RED: how to install it, how to create a first flow, how to work with data, how to persist state, how to add nodes, how to secure the editor, and what to consider before using it for production workloads. Table 1 provides basic information about the Node-RED project.
| Name: | Node-RED |
|---|---|
| URL: | https://nodered.org/ |
| License: | Apache License 2.0 |
| Documentation: | https://nodered.org/docs/ |
| First Release: | 2013 |
| Latest Major Release: | 5.0, released 9 June 2026 |
| Paid Version: | No paid version from the Node-RED project itself; commercial platforms and support offerings exist |
Table 1: Node-RED project information
How to Install Node-RED
Node-RED can be installed with npm, run as a system service, embedded into another Node.js application, or started as a Docker container. For a server-based setup, Docker is the easiest starting point because it keeps the runtime and persistent data separate and makes upgrades straightforward.
The simplest possible command is
docker run -it -p 1880:1880 -v node_red_data:/data --name mynodered nodered/node-red
After the container has started, the editor is available at
http://YOUR_SERVER:1880
With this, you're already completely set up to create your first flow and get to know Node-RED. In this setup, however, the editor is reachable over plain HTTP, there is no authentication configured yet, and anyone who can access the editor can modify and deploy flows. On a public server, that is equivalent to giving strangers the ability to run code on your machine.
A more realistic first deployment on a production server uses Docker Compose and binds Node-RED to localhost so that it can be placed behind a reverse proxy:
services:
  node-red:
    image: nodered/node-red:5.0.1
    container_name: node-red
    restart: unless-stopped
    environment:
      - TZ=Europe/Berlin
    ports:
      - "127.0.0.1:1880:1880"
    volumes:
      - ./node-red-data:/data
Start it with
docker compose up -d
Node-RED stores its user data below /data inside the container. In the Compose example above, that directory is mapped to ./node-red-data on the host. This directory contains the flows, installed nodes, settings file, credentials file, and other runtime data. With this setup, you can stop and even delete the container without losing any of your flow data. If all you do is back up the data directory, you're set up for disaster recovery.
To expose the editor over HTTPS, put a reverse proxy in front of it. With Caddy, a minimal configuration looks like this:
nodered.example.com {
    reverse_proxy localhost:1880
}
After DNS has been configured, Caddy will request a TLS certificate and forward traffic to the local Node-RED container. For internal systems, it is still worth considering whether the editor should be behind VPN or an identity-aware proxy instead of being reachable from the public Internet.
Securing the Editor
The first operational task after installation and setting up HTTPS is to configure authentication. The editor allows users to create flows, install nodes, and deploy JavaScript. This is powerful, but it also means the editor must be treated like an administrative interface.
Editor authentication is configured in settings.js, which lives in the Node-RED user directory. In the Docker setup above, the file is under
./node-red-data/settings.js
Node-RED supports an adminAuth configuration block. A simple local-user setup looks like this:
adminAuth: {
    type: "credentials",
    users: [{
        username: "admin",
        password: "$2b$08$REPLACE_WITH_HASHED_PASSWORD",
        permissions: "*"
    }]
}
The password should be a bcrypt hash, not a plaintext password. You can generate a suitable hash with the Node-RED command-line helper inside the container:
docker exec -it node-red node-red admin hash-pw
Paste the resulting hash into settings.js and restart Node-RED:
docker compose restart
If Node-RED is used by more than one person, shared admin accounts should be avoided. They make it impossible to know who changed a flow and they encourage password reuse. For larger setups, Node-RED can be integrated with external authentication strategies, but the exact setup depends on the surrounding infrastructure. Because Node-RED uses the Passport middleware for authentication, you have a broad selection of authentication strategies at your service, among them Active Directory, OAuth/OIDC, and several vendor-specific strategies. Take a look at the official documentation for securing Node-RED for further information.
It is also worth setting a fixed credentialSecret in settings.js. Node-RED stores credentials such as API keys and passwords separately from the main flow file, but they need to be encrypted. If no explicit secret is configured, Node-RED will generate one. That works until the key is lost or the data directory is moved incorrectly. A fixed secret makes backup and restore behavior predictable.
credentialSecret: "CHANGE_THIS_TO_A_LONG_RANDOM_SECRET",
This value should be stored like any other production secret. Losing it means stored credentials may no longer be readable. Exposing it means an attacker with access to the credentials file may be able to decrypt secrets.
Creating Your First Flow
Node-RED's basic programming model is simple. A message enters a node, the node processes it, and then passes it to the next node. The message is usually a JavaScript object with a payload property. Many beginner flows are built around that one field, but real flows often add additional metadata such as topics, headers, user IDs, or timestamps.
A good first flow is a small HTTP endpoint. In the editor, drag the following nodes onto the canvas:
HTTP In -> Function -> HTTP Response
Configure the HTTP In node like this:
Method: GET
URL: /hello
Then open the Function node and enter
msg.payload = {
    message: "Hello from Node-RED",
    time: new Date().toISOString()
};
return msg;
Click Deploy in the top-right corner. You can now call the endpoint:
curl http://YOUR_SERVER:1880/hello
The response should be a JSON object containing the message and a timestamp.
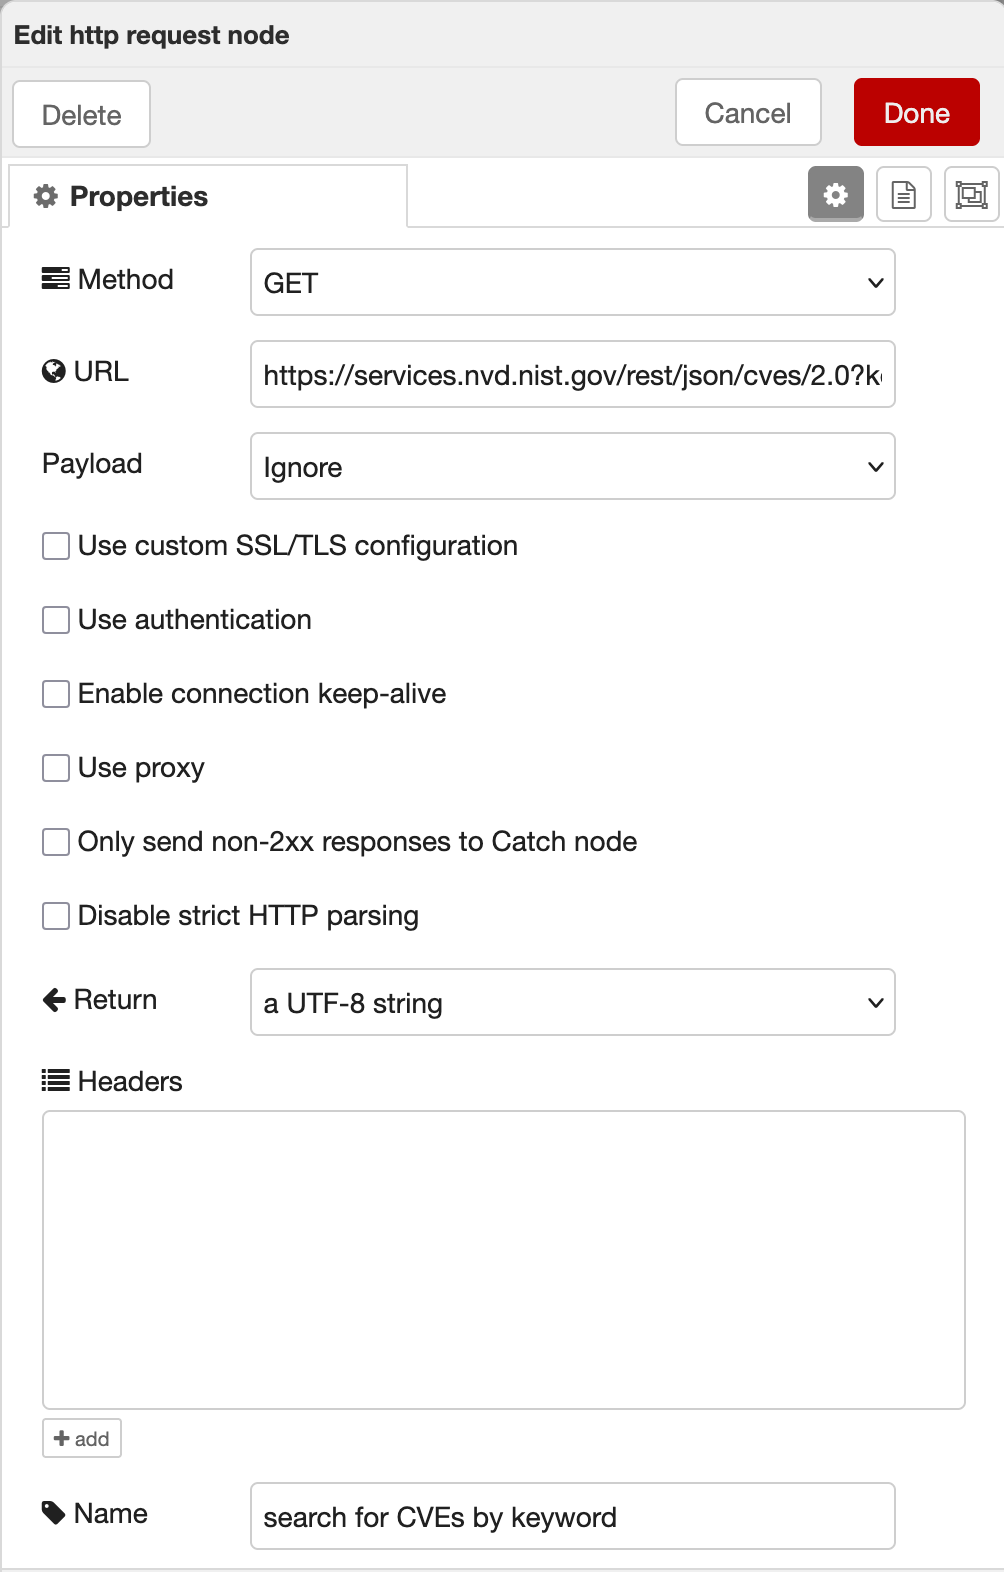
This example is trivial, but it demonstrates the central Node-RED concept. The HTTP node handles the web server part, the Function node handles custom logic, and the Response node sends the result back to the client. The flow is readable without opening a source tree or understanding a framework.
The same pattern can be extended quickly. Add a Template node to return HTML, a Switch node to branch on input values, a Change node to transform fields, or an MQTT Out node to publish the result to a broker. The productivity gain comes from not writing glue code for every input and output mechanism.
Working with MQTT
Node-RED is particularly strong when working with MQTT. This is one of the reasons it is so common in home automation, industrial gateways, and edge deployments. MQTT's publish/subscribe model maps naturally to Node-RED flows: A node subscribes to a topic, the message appears in the flow, and downstream nodes process it.
To test this, first run an MQTT broker such as Mosquitto:
services:
  mosquitto:
    image: eclipse-mosquitto:2
    restart: unless-stopped
    ports:
      - "1883:1883"
    volumes:
      - ./mosquitto:/mosquitto/config
For a quick local test, Mosquitto can be configured to allow anonymous local connections, but bear in mind that this is not suitable for production.
In Node-RED, add an mqtt in node and configure it to connect to the broker. Subscribe to a topic such as
sensors/temperature
Connect the MQTT node to a Debug node and deploy the flow. Then publish a message:
mosquitto_pub -h YOUR_SERVER -t sensors/temperature -m '{"value":22.4,"unit":"C"}'
The message will appear in Node-RED's debug sidebar.
From there, a realistic flow might parse the value, check whether it exceeds a threshold, store it in InfluxDB, and send an alert if the temperature is too high. This kind of integration is where Node-RED is most comfortable. You can see the data path from left to right and add small processing steps without creating a full application.
The same model works for many other event sources: webhooks, serial ports, Modbus devices, OPC UA servers, file watchers, timers, TCP sockets, and API polling. The exact nodes vary, but the mental model remains the same.
Transforming Data
Sooner or later, every Node-RED flow needs to transform data: The incoming value has the wrong field names, the API expects a different JSON structure, a device sends strings instead of numbers, or an alert should only be sent when a value crosses a threshold.
For simple transformations, the Change node is preferable to custom JavaScript. It can set, move, delete, or modify message properties. For example, it can move
msg.payload.value
to
msg.temperature
without writing code.
For conditional routing, the Switch node is the right tool. It can send messages down different paths depending on value comparisons, string matches, or JSONata expressions. A temperature alert flow might look like this:
MQTT In -> JSON -> Switch -> Email
                  |
                  -> Debug
The Switch node checks whether
msg.payload.value > 30
If the condition is true, the message goes to the Email node. Otherwise, it goes only to Debug or storage.
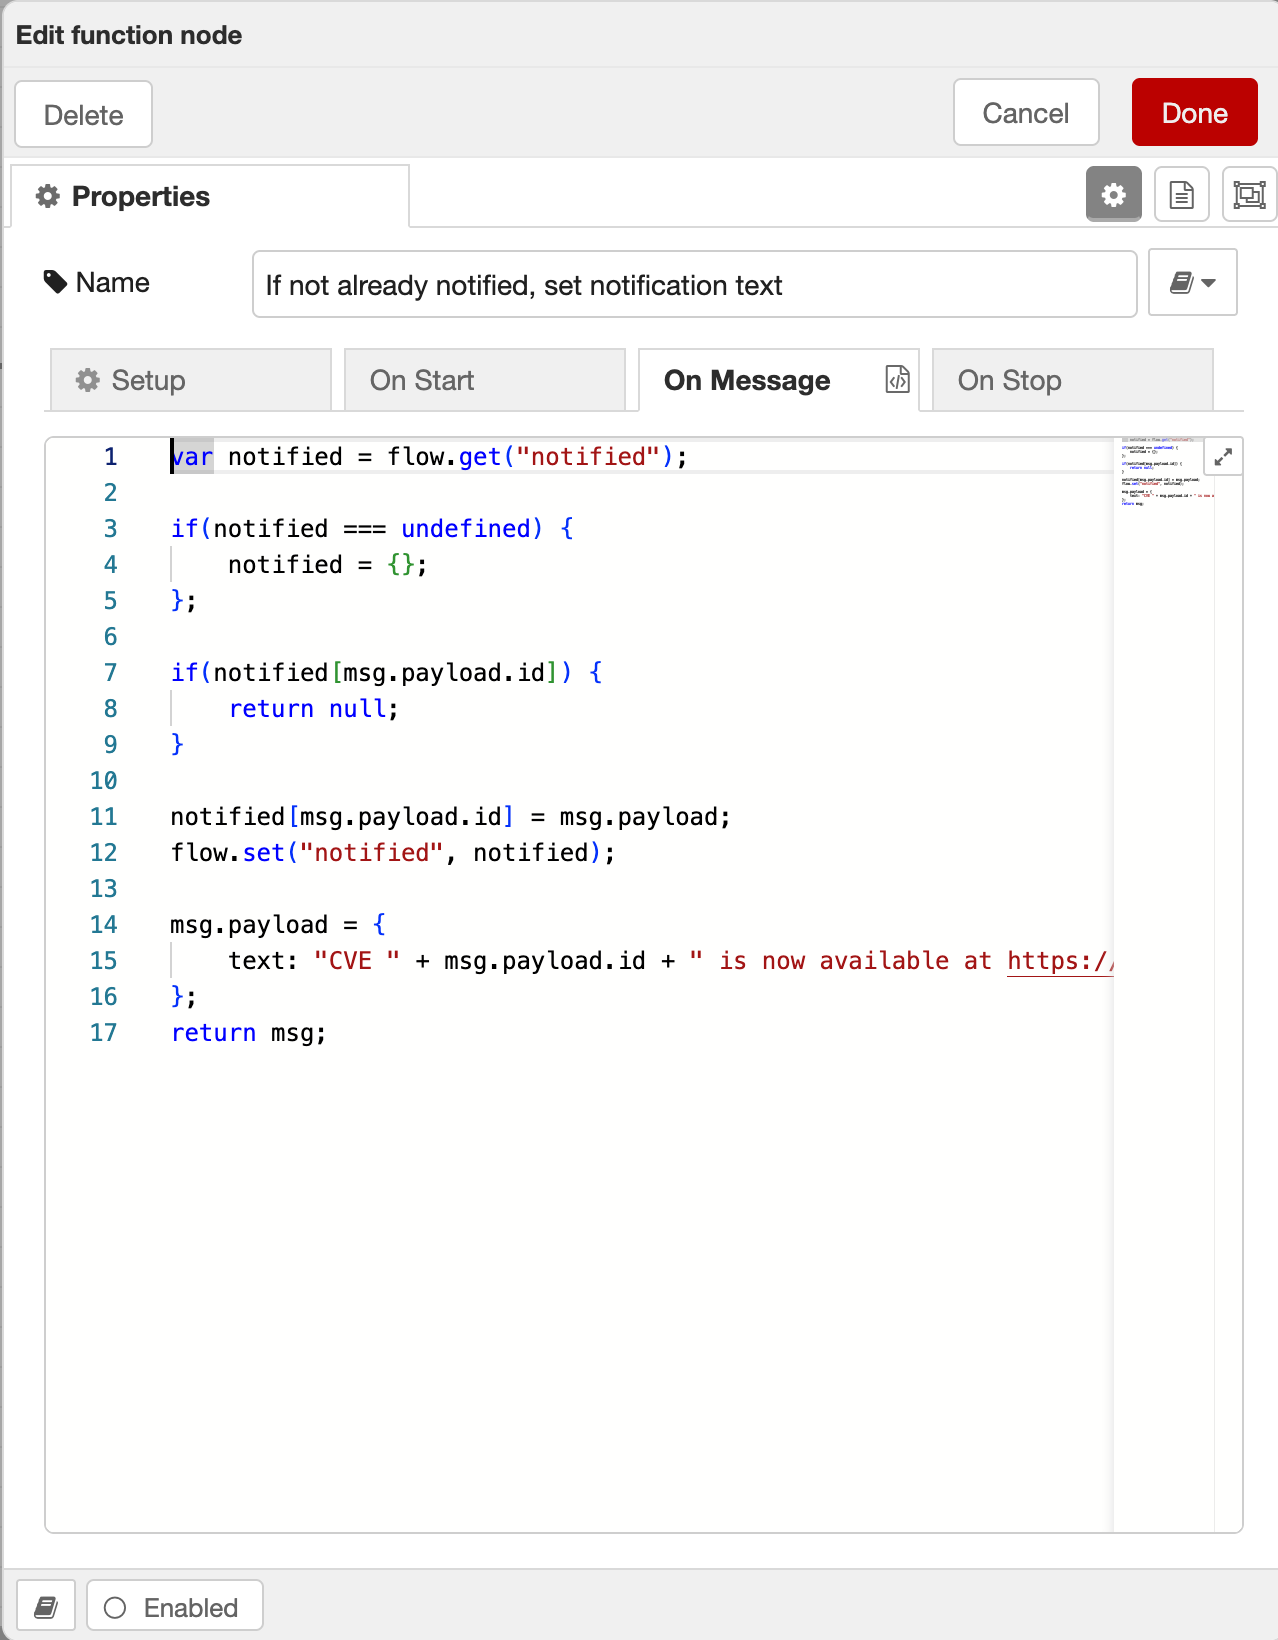
For more complex transformations, the Function node allows JavaScript:
const reading = Number(msg.payload.value);

msg.payload = {
    device: msg.topic.split("/")[1],
    temperature: reading,
    unit: "C",
    receivedAt: new Date().toISOString()
};

return msg;
Function nodes are powerful (Figure 3), but they can also make flows harder to understand. If every node is just a box containing custom JavaScript, much of the visual-programming benefit is lost. A good rule is to use built-in nodes for common transformations and reserve Function nodes for logic that would otherwise be awkward or unreadable.
Installing Additional Nodes
Node-RED ships with a useful core palette, but much of its strength comes from the community node ecosystem. Additional nodes can be installed from the editor using Manage palette. This is how users add support for databases, cloud services, industrial protocols, dashboards, and device-specific integrations.
For development and experimentation, installing nodes from the editor is convenient. For production, it requires more discipline. Nodes are npm packages. They run inside the same Node.js process as the rest of the runtime. A poorly maintained or malicious node can create security and stability problems.
For a production deployment, consider building a custom image instead of installing nodes manually through the editor. A simple Dockerfile might look like this:
FROM nodered/node-red:5.0.1

RUN npm install node-red-dashboard
RUN npm install node-red-contrib-influxdb
Then update the Compose file to build that image:
services:
  node-red:
    build: .
    container_name: node-red
    restart: unless-stopped
    ports:
      - "127.0.0.1:1880:1880"
    volumes:
      - ./node-red-data:/data
This makes the runtime more reproducible. Instead of discovering installed nodes by inspecting a running instance, the dependencies are declared in version control. It also makes it easier to test upgrades in a staging environment before changing production.
Be selective with community nodes. Check the package age, maintenance activity, open issues and whether the node is really needed. It is tempting to install a new node for every service, but sometimes the built-in HTTP Request node plus a small amount of JSON transformation is the cleaner and more secure solution.
Projects and Version Control
Node-RED can store flows as JSON files. That is convenient for the runtime, but it is not always convenient for collaboration. A large flow file can become difficult to review in Git, especially when multiple users edit the same flow.
Node-RED's Projects feature helps by integrating flows with Git. When enabled, each project stores its flow files, credentials metadata, and supporting files in a Git repository. This gives users a more familiar workflow: commit changes, review history, and push or pull from a remote repository.
Projects are not enabled by default in every installation. They can be turned on in settings.js:
editorTheme: {
    projects: {
        enabled: true
    }
}
After restarting Node-RED, the editor offers project-related actions. For a single-user instance this may feel unnecessary, but for team use it is one of the most important features to evaluate.
Even with Projects enabled, version control does not solve every collaboration problem. The visual editor is not the same as a text editor. Merging simultaneous changes to the same flow can still be painful. Teams should agree on basic working rules: avoid editing the same flow at the same time, keep flows modular, use subflows for reusable logic, and commit small changes with meaningful messages.
For production systems, do not rely solely on the live editor as the source of truth. Keep a Git repository, review changes, and have a tested deployment process. Node-RED makes experimentation easy, but production automation should still be treated as software.
Persisting State
Node-RED messages are transient by default. A message enters the flow, passes through nodes, and disappears unless it is stored somewhere. For many automations that is fine. For others, the flow needs state: the last known value of a sensor, the previous API response, a counter, a cache, or a device status.
Node-RED provides context storage for this. Context can exist at node, flow, or global scope. In a Function node, that looks like this:
let count = flow.get("count") || 0;
count += 1;
flow.set("count", count);

msg.payload = { count };
return msg;
By default, context may be stored in memory. That means it is lost when the runtime restarts. For state that must survive restarts, configure a filesystem-backed context store in settings.js:
contextStorage: {
    default: {
        module: "localfilesystem"
    }
}
This writes context data below the user directory. It is useful, but it is not a replacement for a database. If the data matters beyond the immediate flow, store it explicitly in PostgreSQL, SQLite, InfluxDB, Redis, or another system designed for the job.
The distinction is important. Context storage is good for runtime state. A database is better for business data, audit logs, measurements, long-term history, and anything that must be queried or backed up independently.
Dashboards and User Interfaces
Many Node-RED users eventually want to display values, buttons, charts, or control panels. Historically, the Dashboard nodes were the most common way to do this. They allow a flow to create a web-based UI without building a separate frontend application.
A simple dashboard might show temperature readings, provide a button to restart a device, or display the status of several services. For internal tools and operational panels, this can be very efficient. A working dashboard can be built in minutes.
However, dashboards should be used with realistic expectations. Node-RED is excellent at wiring systems together, but it is not a general-purpose frontend framework. If the UI needs complex navigation, multi-user permissions, accessibility guarantees, offline behavior, or a polished customer-facing design, a dedicated web application may be the better choice.
For internal use, dashboards are often good enough and sometimes exactly right. They shine when the alternative would be a spreadsheet, a shell script, or a half-maintained admin page. Just make sure the same security rules apply: protect access, avoid exposing sensitive controls publicly, and log important actions elsewhere.
Backups and Upgrades
A Node-RED instance can look deceptively simple because it may be just one container. The important parts are in the user directory. Backups should include at least
- flows.json
- flows_cred.json
- settings.js
- package.json
- package-lock.json, if present
- installed custom nodes
- project repositories, if Projects are enabled
- filesystem context storage, if used
- any local files read or written by flows
If a database, MQTT broker, or other service is part of the automation, that data must be backed up separately. Node-RED often sits in the middle of other systems, so a restore test should verify the whole workflow, not just whether the editor starts.
A simple backup command for the Compose layout above is
tar czf node-red-data.tar.gz ./node-red-data
This is acceptable for a manual test, but production backups should be automated, copied off-site, encrypted, and tested regularly. Pay particular attention to the credentials file and credentialSecret. If they are separated or restored incorrectly, flows may start but credentials may be unusable.
Upgrades are usually simple with Docker:
docker compose pull
docker compose up -d
Before upgrading, read the release notes. Node-RED depends on Node.js, and major Node-RED releases can change the required Node.js version. Community nodes may also break if they depend on older APIs or native modules. For this reason, pin image tags instead of using latest blindly in production.
A safe upgrade process is:
- Back up the user directory.
- Start a staging instance with a copy of the data.
- Upgrade the staging instance.
- Open the editor and check for warnings.
- Test critical flows.
- Upgrade production.
This may sound excessive for a home automation instance, but it is a reasonable minimum for business-critical automations.
Teamwork
Node-RED can be used by a team, but it is not primarily a collaborative development platform. The editor is excellent for building flows, but simultaneous multi-user editing, code review, and environment promotion require process and tooling around it.
For small teams, the simplest approach is to restrict editor access to a few trusted users and use Projects for Git-backed history. For larger teams, it is better to separate development, staging, and production instances. Developers build and test flows in one environment, then promote reviewed changes to production.
Flow structure matters a lot. A single giant canvas with dozens of unrelated automations quickly becomes unmaintainable. Use multiple tabs, meaningful node names, comments, link nodes, and subflows. Treat the visual layout as documentation. A future administrator should be able to understand the main data path without opening every Function node.
It is also worth agreeing on naming conventions. MQTT topics, environment variables, flow names, node names, and context keys should be predictable. Node-RED makes it very easy to create a quick fix. Without conventions, a year of quick fixes becomes a confusing production system.
Permissions are another limitation to evaluate. Node-RED can restrict access to the editor and HTTP endpoints, but it should not be mistaken for a full enterprise workflow platform with fine-grained approval rules, deployment gates, and audit controls. Those controls can be added around Node-RED, but they are not the default experience.
Security
Node-RED security depends heavily on how it is deployed. A local instance on a Raspberry Pi is one thing. A public instance with access to internal APIs, databases, and industrial systems is something else entirely.
The most important rule is: Do not expose an unauthenticated editor. The editor is an administrative interface that can deploy code. Put it behind authentication, HTTPS, and preferably an additional network boundary such as VPN or an identity-aware proxy.
The second rule is to be careful with secrets. API keys, database passwords, MQTT credentials, and webhook tokens often pass through Node-RED. Use the credentials mechanism instead of hardcoding secrets in Function nodes. Keep credentialSecret safe. Avoid sending secrets to Debug nodes, because debug output is visible in the editor and may be copied into screenshots or logs.
The third rule is to be selective with nodes. Community nodes are powerful, but they are also code from npm. Install only what you need, prefer maintained packages, and test them before using them in production. If a node has broad access to the filesystem, network, or credentials, treat it accordingly.
Flows that receive external input need the usual application-security checks. Validate payloads, limit request sizes, authenticate HTTP endpoints, and avoid passing untrusted values directly into shell commands, SQL strings, or file paths. Low-code does not remove injection vulnerabilities; it just moves them into boxes and configuration panels.
If Node-RED interacts with operational technology, the bar is even higher. A flow that controls a relay, pump, PLC, or building system can have physical consequences. Separate experimental flows from production controls, limit network access, and document manual recovery procedures.
Review & Outlook
Node-RED is one of those tools that looks simple at first and becomes more useful the longer you spend with it. The initial experience is friendly: drag a few nodes onto the canvas, connect them, click Deploy, and see data move. Underneath that, it provides a flexible runtime for event-driven automation, API integration, and edge workflows.
Its strengths are clear. Installation is easy, the editor is approachable, MQTT and HTTP support are excellent, and the community ecosystem covers a large number of systems and protocols. For prototypes, internal tools, home automation, industrial gateways, and small integration services, Node-RED can save a lot of time.
The weaknesses are also worth taking seriously. Large flows can become hard to maintain. Team collaboration requires discipline. Community nodes introduce supply-chain risk. Production deployments need proper authentication, backups, upgrade testing, and secret handling. Node-RED makes automation accessible, but it does not remove the operational responsibilities that come with automation.
For the right use case, Node-RED hits a very useful middle ground. It is more understandable than a pile of shell scripts and cron jobs, lighter than a full integration platform, and faster to work with than writing a custom application for every workflow. As long as administrators treat it as real infrastructure rather than just a visual toy, Node-RED can become a reliable part of a self-hosted automation stack.
This article was made possible by support from Hetzner through Linux New Media’s Topic Subsidy Program.
Learn more about self-hosting on Hetzner infrastructure.